Are you on the journey of turning to a green lifestyle? Then you are in the right place. When you are new to a green lifestyle and wish to transition to go solar, it might feel like you are stepping into a foreign land. To help you in the right direction, we’ll be telling you all about DIY solar panel roof mounts.
Every time more and more people turn to solar panels and see how this change allows them to create a simple, more efficient living space. If you wish to power your home with solar panels and you are all about taking matters into your own hands, then it is pretty likely you’ll want to learn about DIY solar panel mounts.
If you are looking to install your solar energy system, while possible, it is also not something you want to get into unprepared. However, with the correct procedure, everything is possible. Continue reading and learn what you need to know about DIY solar panel roof mounts.
DIY Solar Panel Roof Mount FAQs
Can I install solar panels on my roof myself?
- It is possible to do the process of installing solar panels on your own. There are solar systems designed specifically for DIYers that, while sometimes time-consuming, should be more than doable. If you only want to supplement your traditional energy source, DIY solar panels can get the job done.
- Suppose you’re setting up a more extensive, grid-tied system of over several thousand watts. In that case, the installation can become somewhat complex, and it may be a better option to bring in a professional.
- The biggest hurdle is the wiring, especially in a grid-tied, high-power system. Dealing with electrical connections can be dangerous. Any short circuits can quickly cause fires, so it’s important to know what you’re doing or get a qualified electrician to help you.
Is it hard to install solar panels?
Solar panel installation requires experience with high-voltage wiring and isn’t for novices. The risk of injury during this part of the installation is very real. Not only could you hurt yourself, but you could create costly problems to your home and fuse box if done improperly.
Can you mount a solar panel under the roof rack?
There are lots of ways to mount solar panels. You can buy specific corner brackets made of plastic that screw into the solar panel and then bolt onto a roof rack. The most common way, though is, to mount a solar panel is to bolt it straight to the roof racks.
Is it cheaper to build DIY Solar Panel Roof Mounts?
A DIY solution should cost you less upfront than having a system installed. However, if you build the panels yourself, it may cost you more in the long run. The materials may not be very efficient and may not last as long.
Is a DIY solar panel worth it?
Solar panels may be tempting to install, but their long-term worth may be up for debate due to quality alone. Typically, a solar panel system should continue to generate electricity for 25 to 35 years, so it’s important to invest in quality equipment and a reputable installer.
How do you install solar panels on a roof without drilling?
Another option available for no-drilling solar panel installation is thin-film PV solar laminates. This is a lightweight solution that is easy to install. These panels are attached to the roof with an adhesive and work best on standard standing seam metal roofing panels, a durable and weather-tight roofing system.
How do you set up a solar panel?
When it comes to solar panel installation, there are several ways. You can do it yourself or hire a contractor to do the installation for you. Solar panels can be mounted on your roof with a specialized mounting system or on the floor with a safe, specially-made rack.
How to clean solar panels?
It’s helpful to clean your panels regularly. Dust and grime collect up quickly on these large surfaces, which can reduce the panel’s ability to harness the sun’s power.
You’ll need to wipe them down gently with a cloth or even a soft broom every few months and a mild soap and water solution, especially during periods where there is not a lot of rain.
How to connect solar panels?
Most of the time, solar panels need to be connected in parallel to keep the voltage consistent. This involves connecting all the positive terminals and all the negative terminals.
Connecting your panels in series will boost the voltage, which you’ll only need to do if you’re trying to meet the voltage requirements of your inverter or batteries.
How are solar panels mounted to roofs?
The bolt is attached to the roof rafters, tightly securing the solar panels and the racking system. To ensure there is no possibility of leaking, a piece of flashing is placed underneath the shingle.
Things to consider about DIY solar panel roof mount:
Costs
One of the primary appeals of any DIY project, other than the satisfaction of a job well done, is saving money. When you choose to install solar panels on your property yourself, it means that you won’t have to pay for anyone else’s expertise or labor.
Labor typically accounts for about 10% of the total price tag for installing solar panels. Given the average cost for installing solar panels is $18,500, that means a savings of nearly $2,000.
Installation
It is possible to do the process of installing solar panels on your own. There are solar systems designed specifically for DIYers that, while sometimes time-consuming, should be more than doable.
It’s worth noting, though, that many DIY solar panels are not designed to hook up to the traditional energy grid. They are designed more for off-grid purposes, like powering RVs or other spaces that are not typically served by a standard utility.
Use
Most DIY solar panel projects are not meant to replace traditional energy sources. They offer the ability to supplement power from the grid or power smaller spaces like an RV or a tiny home. But for a full-size home, a professionally installed solar system is likely best.
Some settings are ideal for a DIY solar project. If you have a garage or shed requiring electricity, you can go off the grid and keep it powered with solar panels. DIY solar panels often offer more flexibility in size and placement, so they can be set up in an alignment that works best for you in these settings.
Maintenance
Solar panels typically last about 25 years, but that doesn’t mean there won’t be issues along the way. DIY solar panels, in particular, can be subject to requiring maintenance because the quality is not guaranteed.
Unless a failure falls under the manufacturer’s warranty, you may have to replace the panel on your own.
DIY Solar Panel Roof Mount
#1 Marking Roof Rafters
- For a sturdy foundation, roof-mount flashings should be bolted to your roof rafters. There are a couple of methods for locating where exactly your rafters are:
- Visual Location
Look for rafters under the eaves of your roof. If you can’t spot them, look for the nails that hold the fascia board and/or gutter to the ends of the rafters. - Echo Location
If it’s safe, you can get a feel for where your rafters are by walking around on your roof. The rafters will feel firm, while the space between them will feel slightly spongy. You can also use a rubber mallet to tap around on the roof and listen/feel for the rafters.
#2 Install Roof Attachments
- With the location of your roof rafters marked, it’s time to start installing the attachments that will secure your mounting rails in place.
- Depending on the type of roof you have, the process will differ, but we’ve included steps for the most common types below, along with some tips on spacing and layout for flashings.
#3 Install Racking Rails
With the flashings in place, you’re ready to attach the racking rails. Be sure to keep your Racking Report handy during this step–it specifies rail size and spacing for your system.
- Measure and cut your rails on the ground, so you don’t get metal shavings on your roof.
- Use the supplied hardware to attach the rail to the flashing.
- Use a level to ensure the rails are even. The slots in the L-feet allow for vertical adjustment if needed.
- Tighten rails with a quality torque wrench according to the manufacturer’s torque specs.
- Attach plastic end caps to keep spiders, bees, and other critters out of the rails.
- Attach wire management clips and any hardware for micro-inverters/optimizers to the rails.
- Install grounding equipment as you install your rails.
- When starting a new row, leave space to account for the panel overhang on both sides, as well as a ½- to 1-inch clearance gap between the panels.
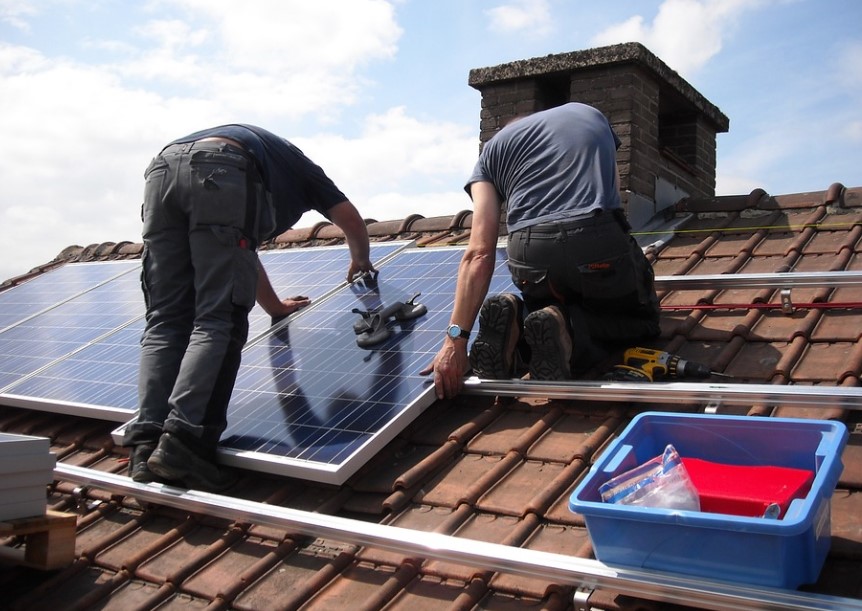
#4 Getting Panels On Your Roof
As you prepare to move your panels onto the roof, b sure to wear protective equipment, use fall protection, and never stand on panels or lift them by the electrical wires.
A ladder with a conveyor belt mechanism on it to help move heavy objects up and down the ladder.
#5 Mounting Panels
- Place the panel, so the mounting holes line up with the rails.
- Use the IronRidge UFO (Universal Fastening Object) clamps to secure the panel in place. Start with the end on the outside edge of the array and drop the T-bolt in the slot in the rail.
- Torque the UFO clamps with stopper sleeves (one in each rail), so they are snug against the outside of the first panel, locking it into place.
- Slot the next pair of UFO clamps on the inside edge of the first panel.
- Place the next panel on the rails so that the clamps are wedged snugly between both panels.
- Tighten the clamps between the panels.
- Repeat this process for each panel in your array. Use the UFO with stopper sleeves attachment to secure the final panel in the row.
DIY Solar Panel Roof Mount Additional Tips
- In general, roof mounting solar panels is more complex than ground mounting or pole mounting. Roof mounts are more challenging to install and maintain, mainly if the roof orientation and angle are not compatible with the optimum solar array tilt angle.
- Penetrating the roof seal is inevitable, and leaks may occur. Also, it is essential to achieve a firm and secure attachment of the array mounting brackets to the roof.
- Attaching the mounting brackets to the rafters will provide the best foundation, but this may not be easy because module size and rafter spacing are usually not compatible.
- If a roof mount is required, be sure to allow a clear airflow path up the roof under the array. The array will operate cooler and produce more energy if it stands at least 3 inches off the roof.
- Flush mounting solar panels to the roof of a building is not recommended. The modules are more difficult to test and replace, and the array’s performance is decreased because of the higher operating temperatures.


